
This post is the fourth in a five part series looking at some of Napoleon’s greatest battles. We have chosen to adopt a wide definition of greatness that goes beyond demonstrations of military skill but also includes factors such as political consequences and the numbers of men involved. This post highlights the Battle of Wagram in 1809, where Napoleon faced one of his most formidable opponents in a tough two-day fight. For other blog posts in this series, click here.
After the Peace of Tilsit in 1807, Napoleon had his desired Franco-Russian alliance, and much of Europe within his continental system. Nevertheless, British commerce still flooded the continent via Portugal, her oldest ally. In order to subdue the Portuguese and force them to cut off British trade, Napoleon had to send an invading force under General Junot through Spain. Although Spain was a French ally, the alliance was not particularly popular in Madrid and led to a political crisis. Napoleon seized the opportunity to install his brother Joseph on the Spanish throne, which led to a series of uprisings in May 1808. Although Junot had managed to take Lisbon by November 1807 and compelled the Portuguese royal family to flee to Brazil, a British force under Arthur Wellesley (the future Duke of Wellington) defeated Junot at Vimeiro in August 1808 and forced the French out of Portugal.
In November, after attempting to reaffirm his alliance with Tsar Alexander at the Congress of Erfurt, Napoleon arrived in Spain personally to take command of a 200,000 man army to oversee not only the pacification of Spain, but the expulsion of the British from the Iberian Peninsula. During the winter of 1808-09, Napoleon forced General Sir John Moore to retreat to northern Spain, leaving Marshal Soult to chase him to the sea. Moore successfully oversaw the evacuation of his 15,000 men from the port of Coruna, but was mortally wounded in the process.
In January 1809, while in Madrid, Napoleon received a nasty surprise with news that Austria had begun to mobilise against him. He soon realised that Tsar Alexander was not going to lift a finger to help him. By 23 January he was back in Paris, both to respond to the Austrian threat but also to attend to rumours of a coup against him. When Austria formally declared war in early February, initiating the War of the Fifth Coalition, Napoleon dispatched his trusted chief of staff Marshal Berthier to take command of French forces in Germany, renamed ‘the Grand Army of Germany’.
The Austrian army was commanded by Archduke Charles, the younger brother of Emperor Francis and by far the Austrian army’s best military commander. Following Austria’s defeat at Austerlitz, Charles had been appointed head of the Hofkriegskrat (War Council) and had introduced a series of reforms to create a more effective fighting force. Having already been defeated on three occasions by Napoleon, Austria desperately hoped for an opportunity to reclaim Italian territories lost to his empire, and saw that one had presented itself. Charles himself was reluctant to go to war with his reforms still unfinished and with Austria diplomatically isolated, but accepted the command. By March Charles occupied Bavaria and managed to gain the upper hand against Berthier, who had not held a field command for a decade.

Archduke Charles of Austria
Napoleon arrived by the middle of April, joined by his Guard which had marched from Spain, and managed to correct Berthier’s mistakes. The Austrians were driven out of Bavaria and Charles was forced to retreat along the Danube towards Vienna. This was Napoleon at his best, coordinating the movements of his corps like a chess grandmaster organising an attack against the enemy king. Napoleon had with him three of his best marshals: Lannes (II Corps), Davout (III Corps), and Massena (IV Corps), as well as his Guard. By 13 May, less than a month after Napoleon’s arrival, the French were in Vienna for the second time in four years.
Although Napoleon hoped the Austrians would sue for peace, Charles remained active on the field with a relatively fresh army of 100,000 men deployed on the Marchfeld, the wide floodplain of the Danube to the northeast of Vienna. On 21 May, Lannes and Massena attempted to cross the Danube and established bridgeheads at the villages of Aspern and Essling. Observing the French movements, Charles sent wave after wave against the two villages, before personally leading an attack against the French centre on 22 May. The successful Austrian attack prompted Napoleon to order a withdrawal to the island of Lobau in the middle of the Danube.
Napoleon had suffered his first major defeat at Aspern-Essling, which also claimed the life of Marshal Lannes, one of his most talented subordinates and a close personal friend. Meanwhile, the Austrian victory served to demonstrate the effectiveness of Charles’s reforms. Nevertheless, Charles failed to take advantage of the situation to bombard the Napoleon’s army on the Lobau, which would serve as a springboard for a future attack. Both armies readied themselves for Round Two by gathering reinforcements, with both sides having more than 150,000 men.
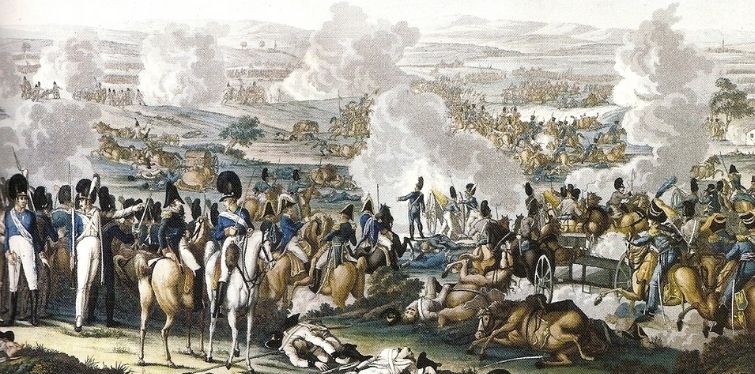
Napoleon began his second attempt to cross the Danube on the evening of 4 July. The Battle of Wagram would be fought on the same ground as Aspern-Essling a month and a half earlier. Rather than advance to meet Napoleon, Charles decided to remain dug in to avoid being targeted by the guns that Napoleon had installed on the Lobau. This enabled Napoleon, through Berthier’s organisational genius, to cross over with 150,000 men and fan out over the Marchfeld. Davout’s III Corps was on the right, as was the custom. Massena’s IV Corps held the left. The centre was occupied by Eugene de Beauharnais’s Army of Italy, the Saxon IX Corps under Bernadotte, and II Corps, commanded by General Nicolas Oudinot who had replaced the late Lannes. Napoleon and his Guard formed the reserve, together with Bessieres’ reserve cavalry. Meanwhile, General Auguste de Marmont’s Army of Dalmatia and a division of Bavarians under General Karl Philipp von Wrede were on their way.
By five o’clock in the afternoon of 5 July, Napoleon had finished his deployment, easily defeating the weak Austrian attempts to attack his forces as they moved into position. Despite these difficult manoeuvres, Napoleon resolved to immediately attack Charles’s position on the Wagram plateau behind the river Russbach. The evening attack did not go well, as Oudinot and Bernadotte were both repulsed, the latter by a brave counterattack once again led by Charles himself. Bernadotte’s Saxons, attacking the Austrians at Deutsch-Wagram, were not helped by the fact that the white Saxon uniforms resembled those of the Austrians and also spoke German. There were numerous incidents of friendly fire which led to significant casualties among the Saxons and caused them to fall back. Bernadotte desperately attempted to rally his men and reassemble them into a viable fighting force. On the French right Davout’s attack against the Austrian flank at Markgrafneusiedl faltered as his exhausted troops could make little progress against the Austrian troops entrenched in a strong position.
Although the attacks on the evening of 5 July met with little success, Napoleon knew that Charles was prepared to fight. This suited Napoleon, who needed a decisive victory against the Austrians on the field to force them to come to terms. It was the same approach which had worked at Austerlitz, Jena-Auerstedt, and Friedland in the glory days of 1805-07. The plan for the following day resembled that of Eylau – to engage the Austrian frontally on the Wagram plateau, while Davout moved against the Austrian left.

Battle of Wagram Map: United States Military Academy | West Point
Charles was more than willing to fight. Buoyed by his success and trusting in the abilities of his men, he moved his headquarters to Deutsch-Wagram and resolved to counterattack the following day in an ambitious attempt to stage a double envelopment around Napoleon’s army. Charles’ main attack would be against Massena on the French left, anticipating that his brother Archduke John would arrive at the battlefield with 13,000 men to strike against Davout. Charles surprised Napoleon by beginning his attack at 4 o’clock on the morning, when Prince Rosenberg’s IV Corps advanced against Davout. Although he had been surprised by the Austrian attack, Davout’s men had been preparing their own offensive measures and were able to respond effectively. Napoleon was under the impression that Archduke John had arrived and rushed to reinforce Davout. In the event, they were nowhere to be seen and Charles realised that IV Corps risked being isolated and ordered Rosenberg to withdraw.
Meanwhile in the French centre, Marshal Bernadotte had decided to abandon his strong defensive position at Aderklaa, claiming that his corps was in a vulnerable position and seeking to move closer to the main French line. The village was duly occupied by the Austrians early in the morning. Upon hearing the news, Napoleon was furious at Bernadotte’s withdrawal, which caused a gap to open up between him and Massena. Ordering Massena to help Bernadotte retake Aderklaa, Napoleon personally rode over to take control of the situation. Seeing the Saxons being repulsed by Austrian counter-attacks and Bernadotte unable to rally them, Napoleon fired Bernadotte on the spot. The French centre left was at breaking point.
Meanwhile, Charles’ main attack against Massena began to take shape, although several hours later than planned. At 8 o’clock Klenau’s VI Corps and Kollowrat’s III Corps began to engage a weakened Massena, who had diverted most of his force to support Bernadotte. Anticipating the Austrian attack, Eugene turned left to hold the Austrians back, leaving the French centre even weaker. Napoleon now ordered Massena to attack Klenau’s flank, even though this would involve him marching in front of the advancing Austrian column and create a large gap in the centre of the French line. Napoleon had the innovative idea of establishing a grand battery of 112 guns to fill the gap. In order to allow time for the guns to be brought up, he ordered Bessieres to charge his Cavalry Reserve into the midst of the Austrians. Both the cavalry and the gunners suffered terribly to allow Massena to execute his manoeuvre, but the Austrians came in range of the French guns on the Lobau and also took many casualties.

Napoleon at Wagram, Horace Vernet
On the French right, Davout was making steady progress against Rosenberg on the Austrian left. A powerful counterattack personally led by Charles threatened to break III Corps, but Davout’s cavalry countered and won the day, forcing Rosenberg to retreat. Observing Davout’s men at Markgrafneusiedl, Napoleon saw that he had gained the upper hand. Only the intervention of Archduke John could have turned the tide, but Charles received word that he would not arrive until 5 o’clock in the afternoon, far too late to have an impact.
With the Austrian left in retreat, at noon Napoleon ordered Massena and Oudinot forwards against the Austrian right. Klenau described Massena’s ‘Infernal Column’ advancing against him, resulting in heavy fighting between cavalry. Much of the fighting centered around Essling, the village that Lannes had defended so bravely a mere six weeks earlier. Klenau was forced to pull back and Massena sent his cavalry forwards against the retreating enemy. The French cavalry could make little progress against the Austrian infantry masses, and during one such attack General Lasalle – one of Napoleon’s finest light cavalry commanders – was killed.
In spite of Davout and Massena’s success against Charles’s flanks, Napoleon recognised that if he were to secure a decisive victory he would need to snap the Austrian line in two by breaking through the centre. Reluctant to use his Imperial Guard, Napoleon turned to the 8,000 men of General Jacques Macdonald’s V Corps. Supported by the Guard Cavalry, Macdonald’s men suffered heavily under enemy musketry and artillery fire. Macdonald requested cavalry support to clear the enemy guns but the Austrians had sufficient time to prepare and withdrew the guns. Macdonald’s attack had failed, though Napoleon managed to bring up reserves to shore up the line. Despite repulsing the attack on the centre of his line, Charles ordered his army to withdraw from the field.

Battle of Wagram Map: United States Military Academy | West Point
Although defeated, Charles had managed to withdraw his army in reasonably good order. The French were too exhausted to pursue the Austrians immediately. Marmont was ordered to spearhead the pursuit with his fresh corps and caught up with Charles’s rearguard on 10 July at Znaim and threatened to be overwhelmed, and only the timely arrival of Massena and Oudinot prompted Charles to seek an armistice, which Napoleon readily accepted. As Charles’s offer of the armistice was unsanctioned by his brother, he was unceremoniously dismissed from office and would never hold senior command again. Without Charles at the head of the army, any further resistance was futile. Peace would be made in 1810 with the Treaty of Schonbrunn, which saw Austria lose the province of Galicia to the Duchy of Warsaw. Napoleon also managed to conclude an alliance with Austria, sealed with his marriage to the 19-year-old Archduchess Maria Louisa, who would become Empress Marie Louise of France.
The Battle of Wagram was the largest battle fought in Europe at the time. Both sides suffered casualties of 30-40,000 men. Although it soon led to peace, it was far from the complete victories Napoleon had secured at Austerlitz, Jena-Auerstedt, or Friedland. With many of his best men still stuck in Spain, the calibre of his army was not the same, while the quality of the Austrian soldiers had increased considerably. The campaign of 1809 taught Napoleon and his army to respect the Austrian rank-and-file, while becoming even more dismissive of the Austrian court. In Lannes and Lasalle, Napoleon had lost some of his best generals. In hindsight, Wagram marked a crucial point in the decline of Napoleon’s military fortunes.
Wagram was a lot more like Marengo, where Napoleon had turned defeat into victory. At Marengo, Napoleon was saved by the timely arrival of Desaix. At Wagram, Napoleon demonstrated his ability to react to developments on the battlefield by his bold decision to order Massena to attack Klenau and plugging the gap with his cavalry and artillery. Even so, had Charles’s attacks been better co-ordinated, Napoleon would not have had the time to deal with them one by one. Victory at Wagram spared Napoleon’s blushes, and he promptly named three new marshals: Macdonald, Oudinot, and Marmont. The soldiers remarked, ‘Macdonald is France’s choice. Oudinot is the army’s choice. Marmont is friendship’s choice.’ Berthier was named Prince of Wagram, Massena Prince of Essling, and Davout Prince of Eckmühl. The War of the Fifth Coalition was over. With an Austrian alliance and a new Austrian bride, Napoleon had the opportunity to turn his attention back to Spain – and to dynastic considerations.

Share and get 15% off!
Simply share this product on one of the following social networks and you will unlock 15% off!